White chocolate cookies cooked in under 30 minutes!
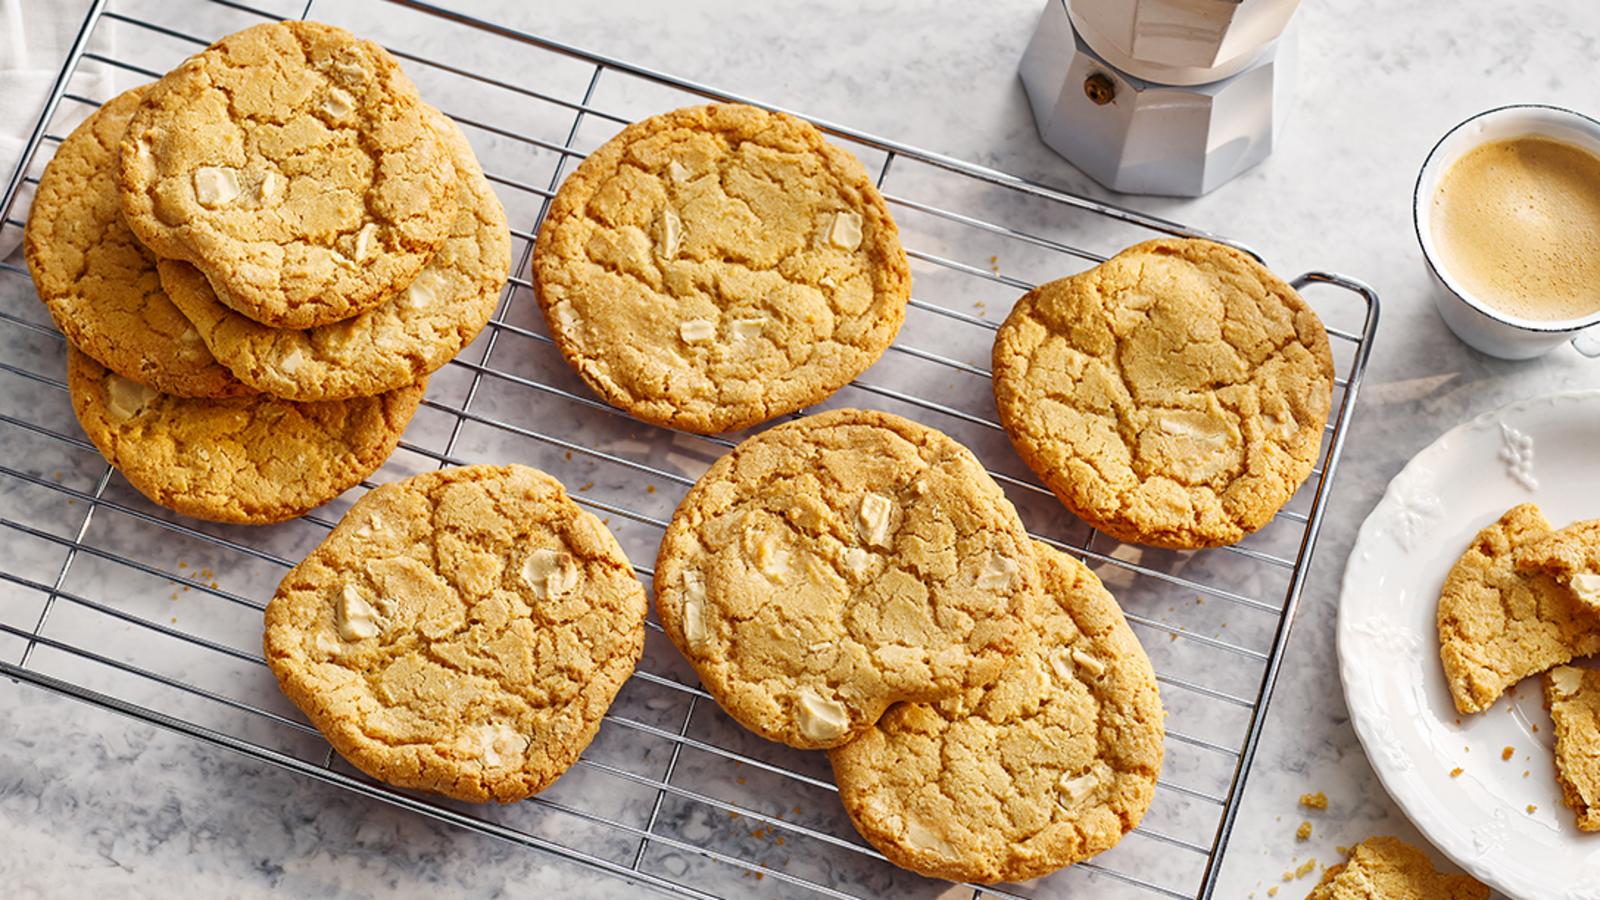
Serve these white chocolate chip cookies with a cold glass of milk for the ultimate after-school snack or a well-deserved work-break treat. Soft in the middle, lightly crisp around the edges, and studded with sweet, creamy pockets of white chocolate, they’re the kind of cookies that feel instantly comforting and impossible to resist.
For the very best texture and flavor, it’s lovely to use a good-quality block of white chocolate chopped into generous chunks rather than standard chocolate chips. Chopping the chocolate by hand gives you a variety of sizes, which means you get bigger, more indulgent pockets of melted chocolate throughout each cookie. As the cookies bake, these chunks soften and melt, creating those dreamy, luxurious bites where the chocolate pools slightly and contrasts beautifully with the soft, buttery dough.
That said, white chocolate chips work perfectly well too and are a great, convenient alternative if that’s what you have in the cupboard. They still provide plenty of sweetness and creamy flavor, making the recipe wonderfully flexible and easy to adapt to suit your preferences or ingredients on hand—without compromising on how delicious the final cookies turn out.
If you have a little extra time, the cookie dough can be left to rest overnight in the fridge, which is a great way to take these cookies to the next level. While this step is completely optional, resting the dough allows the ingredients to fully hydrate and the flavors to deepen, resulting in a richer, more balanced taste. Chilling also helps the dough firm up, meaning the cookies bake thicker, with a beautifully soft centre and slightly crisp edges. Whether you choose to bake the dough straight away or let it rest overnight, you’ll still end up with delicious, bakery-style cookies every time.
Best of all, these cookies are quick and easy to bake, making them perfect for busy days or spontaneous baking sessions. Once in the oven, they take anywhere from just 10 to 30 minutes to cook, depending on the size of the cookies and whether you prefer them pale and soft or more golden and crisp around the edges. Ideal for when you’re craving something homemade, comforting, and sweet without spending hours in the kitchen, these white chocolate chip cookies are a simple pleasure that always delivers warm, satisfying results.
White chocolate cookies- ingredient list!
150g/5½oz caster sugar, 100g/3½oz light soft brown sugar, and 130g/4½oz softened unsalted butter
One teaspoon of vanilla bean paste
One huge free-range egg and one free-range egg yolk
275g/9½oz plain flour
One teaspoon of baking powder
220g/7½oz white chocolate, finely chopped; ½ tsp bicarbonate of soda; ½ tsp fine sea salt
White chocolate cookies- step by step instruction guide!
Step 1
Using a stand mixer fitted with the paddle attachment, or an electric hand-held whisk, add the butter, both sugars, and the vanilla to a large mixing bowl. Cream everything together for 3–4 minutes, scraping down the sides of the bowl as needed, until the mixture becomes pale, light, and fluffy. This step is important, as properly creaming the butter and sugars helps create a soft, tender cookie with a perfect texture. Once the mixture is smooth and creamy, add the whole egg followed by the egg yolk. Beat again for about a minute until fully incorporated, glossy, and silky in texture, ensuring there are no streaks of egg remaining. Next, add the flour, baking powder, bicarbonate of soda, and salt to the bowl. Mix on a low speed, just until the dry ingredients are combined with the wet mixture—be careful not to overmix, as this can make the cookies dense rather than soft and chewy. Finally, gently stir in the white chocolate, making sure it is evenly distributed throughout the dough so every cookie gets plenty of sweet, creamy chocolate in every bite.
Step 2
Line a large baking tray with baking paper to prevent the cookies from sticking and to make cleanup easier. Using an ice-cream scoop or a spoon, portion the dough into 14 evenly sized balls and place them onto the prepared tray, leaving a little space between each one. Shaping the dough evenly at this stage helps ensure the cookies bake uniformly. Once portioned, place the tray into the fridge and allow the dough to chill for at least 3 hours, or ideally overnight for the best possible results. Chilling the dough helps the cookies hold their shape during baking and allows the flavours to develop more fully, resulting in thicker, better-textured cookies. If you’re short on time, you can alternatively place the tray in the freezer for about 15 minutes to firm up the dough before baking.
Step 3
Preheat the oven to 180°C (160°C fan, Gas Mark 4) so it reaches the correct temperature before baking. Once ready, bake the cookies in small batches of 5 or 6 at a time, making sure to leave plenty of space between each one, as the dough will spread as it bakes. Place the trays in the oven and bake for 12–14 minutes, until the edges are lightly golden and set, while the centres remain slightly soft. This is exactly what you want, as the cookies will continue to firm up as they cool, resulting in a perfectly soft and chewy middle with lightly crisp edges. Once baked, remove the trays from the oven and allow the cookies to cool on the trays for a few minutes before serving. This brief cooling time helps them set while still keeping that irresistible warm, freshly baked texture.
White chocolate cookies- recipe tips!
Feel free to swap the white chocolate for any other type of chocolate you prefer, such as milk, dark, or even a combination of different chocolates, depending on your taste. You can also experiment with adding extras like chopped nuts or dried fruit to make the cookies your own.
If you don’t want to make a full batch all at once, this recipe is easy to adapt. You can freeze half of the uncooked dough to enjoy freshly baked cookies at a later date. Shape the dough either into one large roll or portion it into individual balls after step 2, then double wrap it tightly in cling film to protect it from freezer burn. When you’re ready to bake, simply thaw the dough slightly, bake as directed, and enjoy warm, homemade cookies whenever the craving strikes.