Halloween chocolate cake- no.1 spooky recipe!
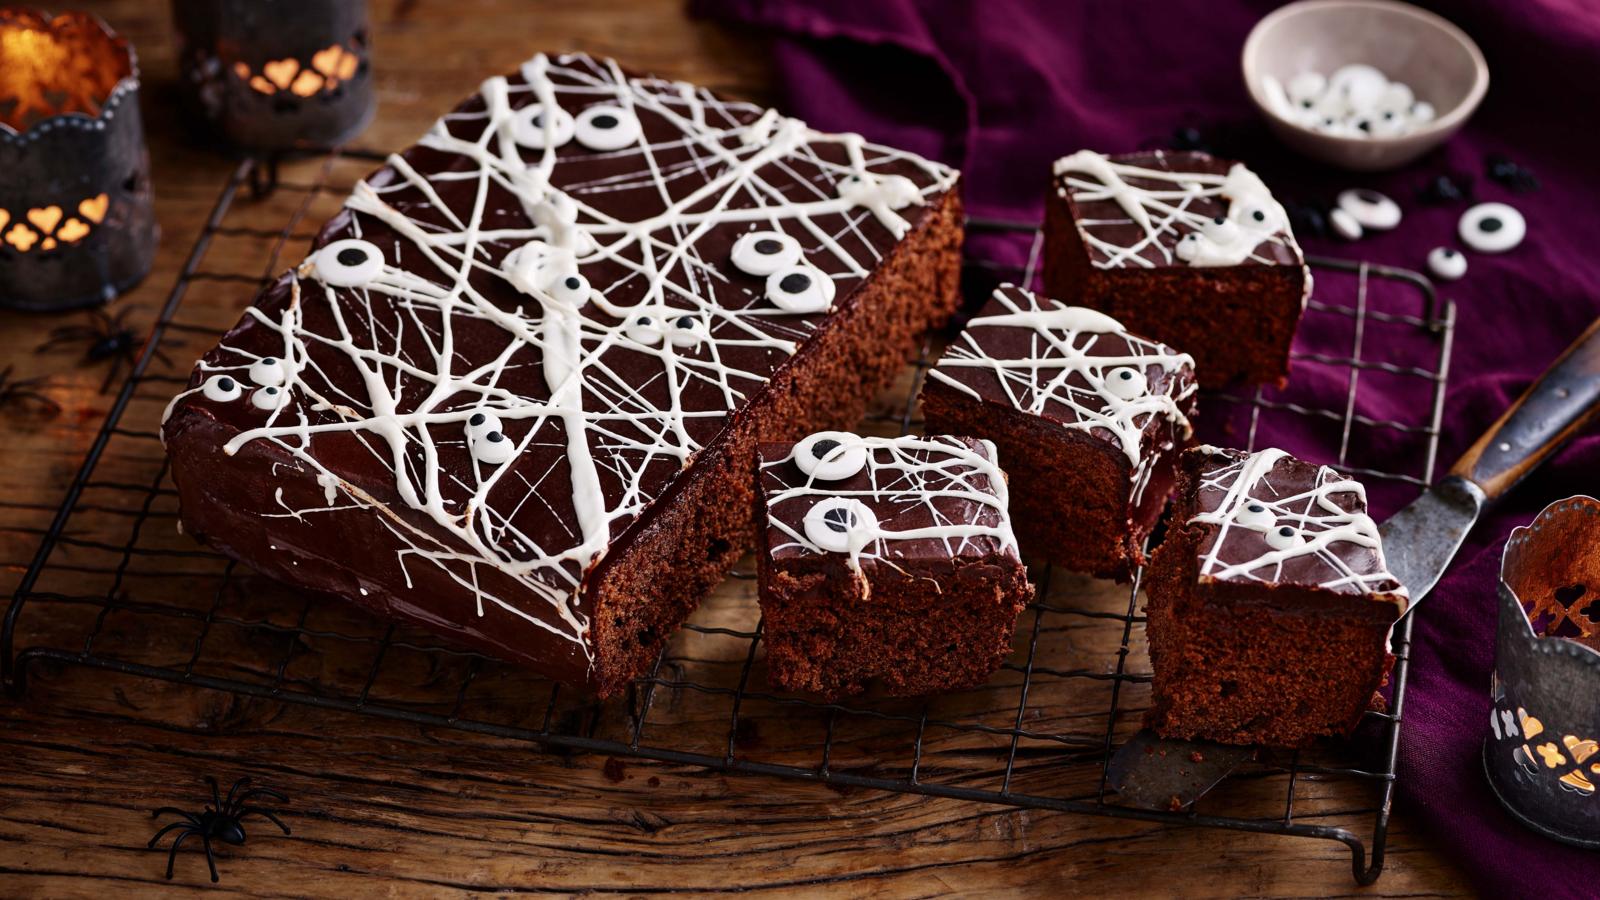
Be prepared to get your hands a little messy — this Halloween chocolate cake is all about fun, flavor, and a touch of spooky creativity! Between the rich, fudgy layers and the sticky, marshmallowy cobwebs draped over the top, it’s a dessert that embraces the playful chaos of Halloween baking. This cake is the perfect centerpiece for a kids’ Halloween party — festive, just the right amount of spooky, and guaranteed to bring smiles (and maybe a few sticky fingers). Children will love helping stretch the marshmallows into cobwebs, and adults won’t be able to resist sneaking a slice once it’s ready.
Another reason to love it? It’s wonderfully simple to make. You’ll need less than 30 minutes to prepare, and then 30 minutes to an hour to bake until it’s perfectly soft, moist, and full of chocolatey goodness. Once cooled, the decorating fun begins — think glossy marshmallow webs, a sprinkle of cocoa or icing sugar for texture, and maybe a few edible spiders or candy eyes to complete the look.
This recipe serves 10 delicious portions, making it ideal for sharing at parties, school events, or cozy Halloween movie nights at home. It’s indulgent without being fussy, and the combination of rich chocolate and gooey marshmallow makes every bite a delight. Whether you’re an experienced baker or just looking for a fun seasonal project, this cake is a guaranteed crowd-pleaser. It’s festive, fun, and full of personality — the kind of treat that turns a simple Halloween gathering into a sweet, sticky celebration. So roll up your sleeves, embrace the mess, and get ready to bake a dessert that’s as spooky as it is spectacular!
Halloween chocolate cake- ingredient list!
250g (9oz) of softened unsalted butter + extra for lubrication
250g (9 oz) of caster sugar
Four eggs from a free range, softly beaten
One teaspoon of vanilla cream
½ teaspoon optional black gel food colouring
Powdered cocoa, 50g/2oz
Self-raising flour, 200g/7oz
200g/7oz of finely chopped dark chocolate (at least 70% cocoa solids)
Double cream, 200ml/7fl ounce
Ten delectable candy eyes and white marshmallows
Halloween chocolate cake- step by step instruction guide!
Step 1
Preheat your oven to 180°C (350°F, Gas Mark 4). This ensures that the oven reaches the correct temperature before you place your dish inside, allowing for even cooking and the best possible results. Give the oven at least 10–15 minutes to heat up fully before you begin baking.
Step 2
To make the cake, grease and line a 20 x 30 cm (8 x 12 in) rectangular cake tin with baking paper. Start by lightly brushing or rubbing a thin layer of butter or oil around the base and sides of the tin to help the paper stick. Then, cut a piece of baking paper to fit the base and press it into place, smoothing out any wrinkles. For extra assurance that the cake won’t stick, you can also line the sides or lightly grease the paper once it’s in the tin.
Step 3
Using a handheld mixer, beat the sugar and butter until they are light and fluffy. Gradually add the eggs, beating thoroughly in between each addition. With the remaining egg, mix in the vanilla essence and, if using, the black gel food colouring. In a bowl, sift the flour and cocoa powder together. Until the flour is completely incorporated, fold it into the butter mixture. Using the back of a spoon, smooth the batter's surface after spooning it into the prepared tin.
Step 4
Bake the cake for about 30 minutes, or until the surface is golden brown and the sponge feels lightly springy to the touch. To check if it’s fully baked, insert a skewer or toothpick into the centre of the cake — if it comes out clean, with no wet batter clinging to it, the cake is ready. Once baked, remove the tin from the oven and allow the cake to cool in the tin for about 10 minutes. This resting period helps the structure of the cake set and makes it easier to handle. After that, carefully turn the cake out onto a wire rack, peel away the baking paper, and leave it to cool completely before icing, slicing, or serving.
Step 5
Put the cream in a saucepan and bring it just to a boil to make the chocolate ganache icing. Transfer to a heat-resistant bowl. Gradually mix in the chopped chocolate until it melts completely and the ganache becomes glossy and silky. After a few minutes, let it cool until it's only warm to the touch. Lay the cake out on a large piece of baking paper or newspaper (on the cooling rack). Spread half of the ganache evenly over the centre of the cake, then add more as necessary to achieve a lovely, uniform coating on the sides and top. Let it cool and solidify.
Step 6
Meanwhile, prepare the marshmallow mixture. Lightly grease a non-stick saucepan with a small amount of butter — this will help prevent the marshmallows from sticking as they melt. Add the marshmallows to the pan and place it over a low heat, allowing them to soften gradually. Stir frequently with a heatproof spatula or wooden spoon to ensure they melt evenly and don’t catch on the bottom. Alternatively, you can place the marshmallows in a lightly buttered, heatproof bowl and melt them in the microwave, heating in 10-second bursts and stirring well after each interval until smooth and glossy. The marshmallows don’t need to melt completely while still on the heat — once they’re mostly softened, you can remove them from the stove (or microwave), as the residual heat will finish the job. Take care not to overheat or burn the marshmallows, as this can cause them to become tough, sticky, or develop a scorched flavour
Step 7
Before pinching the marshmallow between your fingers and peeling it apart into thin strands, make sure it isn't too hot. Spread the strands in an uneven zigzag pattern on the cake. Rinse your fingers in warm water and pinch the marshmallow again once it has cooled down too much to pull. In the spaces between the marshmallow cobweb, arrange the edible eyes in pairs.