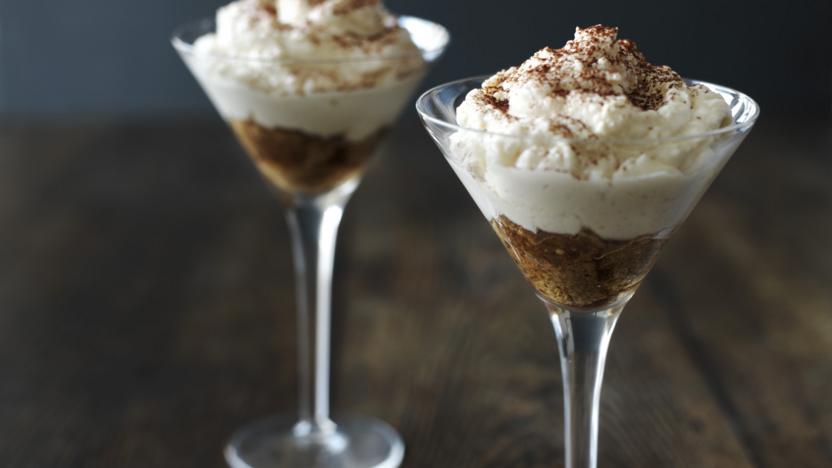
Delicious mini tiramisu in 30 minutes!
For someone who once proudly dismissed tiramisu altogether, I’ve somehow become its most devoted admirer, finding almost any excuse to make a new version whenever the opportunity arises. Over time, I’ve completely fallen for its irresistible layers of coffee-soaked sponge, silky mascarpone and delicate dusting of cocoaa, and now it has become one of those desserts I return to again and again. This version goes back to the classic Italian-inspired combination that made tiramisu so beloved in the first place, although in a slightly dinkier and more manageable format.
The smaller size isn’t because I’ve suddenly developed a love for all things miniature and cute - far from it - but because it makes this dessert far more practical for everyday occasions. Instead of committing to a huge tray designed to feed a crowd, these individual servings are ideal when you want a tiramisu that feels special without making enough for an army. They’re perfect for smaller gatherings, date nights, weekend dinners or those occasions when you simply want an elegant homemade dessert waiting in the fridge.
One of the best things about this recipe is just how effortless it is to put together. With no cooking or baking required, it wonderfully low-effort while still looking impressive enough to serve at a big family dinner or special occasion. Everything can be assembled in around 30 minutes, making it an ideal make-ahead dessert when you want something rich, creamy and indulgent without spending hours in the kitchen. Once chilled, the flavours deepen beautifully as the coffee, mascarpone and sponge meld together into the perfectly soft, luxurious texture tiramisu is known for.
Whether served after a relaxed Sunday roast, a celebratory family meal or a casual dinner with friends, this classic dessert always feels comforting, elegant and just a little bit indulgent. The individual portions also make serving simple and stress-free, allowing everyone to dive straight into their own perfectly layered tiramisu with a generous dusting of cocoa on top.
Delicious mini tiramisu ingredient list!
100ml/3½fl oz of strong instant coffee or espresso
Two tablespoons of coffee liqueur
Four Savoiardi biscuits, or "ladyfinger" biscuits made of fine sponge
Two egg whites from a free-range
Mascarpone, 250g/9oz
Two tablespoons of honey
Two tablespoons of Marsala
One teaspoon of cocoa powder
Delicious mini tiramisu- step by step instruction guide!
Step 1
Make your espresso and pour it into a heatproof jug or bowl large enough for dipping the sponge fingers later on. Stir in the coffee liqueur while the espresso is still warm so the flavours combine smoothly, creating that rich, slightly bittersweet mixture that gives tiramisu its unmistakable depth and warmth. The coffee and liqueur together form the heart of the dessert, soaking into the sponge fingers and transforming them into soft, flavour-packed layers once chilled.
Step 2
Leave the mixture to cool completely before using - this helps prevent the sponge fingers from becoming overly soggy too quickly. If you’re impatient like me, placing the jug outside the window on a cool day for around ten minutes works brilliantly and speeds things up nicely. You want the coffee mixture cool enough to dip the biscuits into briefly without steaming, while still keeping all those bold espresso aromas intact.
Step 3
Break each Savoiardi sponge finger into roughly four smaller pieces and divide them between four small martini glasses, dessert glasses or ramekins, layering the pieces loosely so there are plenty of gaps for the coffee mixture to soak through. Using smaller pieces rather than whole biscuits helps create more even layers and gives the finished tiramisu a softer, more delicate texture throughout. Slowly pour the cooled espresso and coffee liqueur mixture evenly over the sponge pieces, allowing the biscuits time to absorb all the rich coffee flavour. Press down gently with the back of a spoon to help the liquid soak through completely, making sure every piece is coated without turning the mixture overly soggy. The sponge fingers should soften enough to become beautifully tender while still holding a little structure, creating those classic melt-in-the-mouth layers tiramisu is known for.
Step 4
As the coffee mixture settles into the biscuits, the dessert already starts to take on its signature flavour - rich, creamy and deeply comforting with just the right balance of sweetness and bitterness. Leave the soaked sponge layer to sit for a few minutes while you prepare the mascarpone topping, giving the flavours a little more time to develop before assembling the final layers.
Step 5
Using an electric hand-held whisk for ease, beat the egg whites in a clean bowl until they form soft peaks when the whisk is lifted out. The mixture should look light, airy and glossy, holding its shape gently without becoming too stiff. This step is key to giving the tiramisu its signature lightness, helping to balance the richness of the mascarpone. Once ready, set the egg whites aside briefly while you prepare the next mixture. In a separate bowl, scrape in the mascarpone and add the honey. I love how its mellow sweetness pairs with the Marsala, giving the filling a gentle warmth and depth, although caster sugar would work just as well if preferred. Using the same whisk (no need to clean it), beat until smooth and creamy. Once combined, slowly drizzle in the Marsala while whisking, allowing it to fully incorporate so the mixture stays silky and lump-free, resulting in a rich yet airy cream ready to layer into the tiramisu.
Step 6
Gently fold the whipped egg whites into the mascarpone mixture a third at a time, taking care to keep as much air in the mixture as possible so it stays light, fluffy and mousse-like. Use a slow, sweeping motion with a spatula until everything is just combined and smooth, with no streaks of egg white remaining. This delicate folding step is what gives the tiramisu its signature airy texture, so it’s worth taking your time here rather than rushing. Once combined, spoon or dollop the mixture over the soaked Savoiardi in each glass, dividing it evenly between portions. Use the back of a spoon to gently swirl and shape the top into an elegant peak, creating soft, billowy ripples that make each serving look beautifully finished and a little dramatic.
Step 7
Place the glasses in the fridge to set for at least 20 minutes, or ideally up to 24 hours if you want the flavours to deepen and the layers to fully meld together. When ready to serve, dust generously with cocoa powder, sifting it through a fine-mesh strainer for an even, delicate finish just before bringing them to the table.