Crunchy chicken cutlets for a lazy Saturday night!
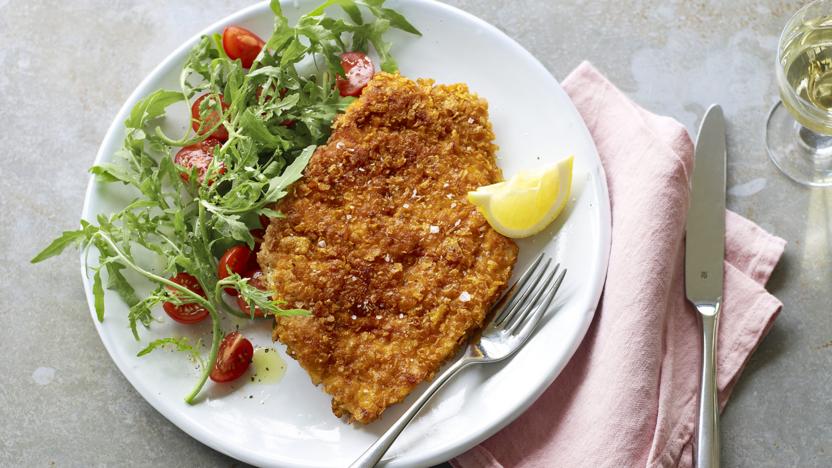
Crunchy chicken cutlets are the ultimate comfort food with a gourmet twist. Each piece is coated in a beautifully golden, ultra-crispy crust that delivers a satisfying crunch from the very first bite, giving way to juicy, tender chicken inside. The contrast in textures is what makes them so irresistible - crisp on the outside, succulent and flavourful in the centre. Every mouthful feels indulgent, yet the simple ingredients keep the dish approachable and homely.
Instead of using classic breadcrumbs, we’ve swapped them for crushed cornflakes, which take the crunch factor to a whole new level. The cornflakes create a thicker, more textured coating that turns gorgeously golden as it cooks, offering an extra-crispy finish you just don’t get with traditional crumbs. They also add a subtle hint of sweetness that complements the savoury seasoning perfectly, creating a balanced, deeply satisfying flavour.
Despite looking and tasting impressive, these chicken cutlets are surprisingly easy to prepare. They take less than 30 minutes to get ready, with around 1 hour of cooking time, making them ideal for when you want something special without spending all evening in the kitchen. The preparation is simple and straightforward, yet the final result feels elevated and restaurant-worthy.
That’s what makes them perfect for a cosy date night at home- pair them with a fresh salad, roasted vegetables or creamy mashed potatoes, and you have a meal that feels thoughtful and indulgent. At the same time, they’re comforting and unfussy enough to become a staple easy Sunday night dinner recipe, ideal for winding down the weekend with something warm, crunchy and completely delicious.
Crunchy chicken cutlets- ingredient list!
Two 200-300g/7-10½oz chicken breast fillets, preferably organic, with 70g/2½oz Dijon mustard
One minced or finely grated garlic clove and half a teaspoon of ground cinnamon
One egg that is free-range
75g (2¾oz) of cornflakes
One-half teaspoon of paprika or pimentón picante
Two tablespoons of sun oil
Ingredient list to serve-
cherry tomatoes, rocket, or your preferred salad greens
Cut one lemon into wedges.
Crunchy chicken cutlets- step by step instruction guide!
Step 1
Take the chicken out of the fridge about 20-30 minutes before you plan to start cooking so it has time to come up slightly towards room temperature. Cooking chicken straight from the fridge can cause it to cook unevenly, with the outside browning too quickly while the centre remains cooler. Allowing it to lose some of that chill helps it cook more evenly and results in a juicier, more tender finish once fried.
Step 2
Pat the chicken dry with kitchen paper before seasoning or coating, as removing excess moisture will help the coating adhere properly and encourage a crisp, golden crust when it hits the pan. This small step makes a noticeable difference to the final texture. If you are using filleted chicken breasts rather than ready-prepared escalopes, you’ll need to prepare them first. Follow the method described in the tips section to slice or butterfly the chicken into thinner, even pieces. This ensures they cook quickly and evenly, and gives you that classic cutlet-style shape that’s perfect for frying and achieving maximum crunch.
Step 3
Take out a shallow dish - ideally one large enough to comfortably fit both escalopes in a single layer. This will make it much easier to coat them evenly. Spoon in the mustard and add the crushed or finely grated garlic, spreading them slightly across the base of the dish. Sprinkle in the cinnamon, then crack in the egg. Using a fork or small whisk, beat everything together until fully combined and smooth. The mixture should be well blended, with the egg loosening the mustard into a thick, fragrant coating that will cling beautifully to the chicken. The cinnamon adds a subtle warmth in the background, enhancing the savoury flavours without overpowering them.
Step 4
Lay the escalopes into the dish and turn them over a few times so they are thoroughly coated on both sides. Make sure every surface is covered in the mustard mixture, then leave them to sit and marinate lightly while you prepare the “crumbs.” This brief resting time allows the flavours to infuse the chicken and helps the coating adhere more effectively when you move on to the next step.
Step 5
Place the cornflakes into a medium-sized bowl and gently crush them by hand. Don’t worry - this isn’t as brutal as it sounds! Simply break them apart with your fingers until you have coarsely crushed flakes. The goal is to create texture, so avoid crushing them into fine crumbs or dust, which would lose the signature crunch. Once the cornflakes are evenly crushed, sprinkle in the pimentón or paprika for a smoky, slightly sweet depth of flavour. Use a fork to mix everything together, ensuring that the spices are evenly distributed throughout the flakes. This seasoned cornflake mixture will form the delicious, crispy coating that makes your chicken cutlets irresistibly crunchy and full of flavour.
Step 6
Take each egg-and-mustard-soaked escalope and dredge it thoroughly in the crushed cornflake mixture, one at a time. Press gently as you coat them to ensure the flakes stick well to every surface, creating an even, crunchy layer that will bake beautifully. Make sure no spots are left uncovered - the more evenly coated, the crispier the cutlets will be. Once coated, carefully transfer the escalopes to a wire rack. Let them sit for 5-10 minutes to dry slightly before cooking. This resting period helps the coating adhere better during frying or baking, reducing the risk of it falling off and giving you that perfect, golden, shatteringly crunchy finish. It’s a small step that makes a big difference in achieving that irresistible texture.
Step 7
Heat the oil in a heavy-duty frying pan or cast-iron skillet large enough to accommodate the chicken pieces. When the chicken is heated, cook it for three minutes on the first side. Carefully flip it over and cook it for another three minutes. The chicken should be cooked through in the middle by then, but make sure to check. Transfer to dishes that are already adorned with your preferred salad greens or tomatoes and rocket.